Catalina - Capri - 25s International Assocaition Logo(2006)  
Assn Members Area · Join
Association Forum
Association Forum
Home | Profile | Register | Active Topics | Forum Users | Search | FAQ
 All Forums
 Catalina/Capri 25/250 Sailor's Forums
 Catalina 25 Specific Forum
 Another wiring question

Note: You must be registered in order to post a reply.
To register, click here. Registration is FREE!

Screensize:
UserName:
Password:
Format Mode:
Format: BoldItalicizedUnderlineStrikethrough Align LeftCenteredAlign Right Horizontal Rule Insert HyperlinkInsert EmailInsert Image Insert CodeInsert QuoteInsert List
   
Message:

* HTML is OFF
* Forum Code is ON
Smilies
Smile [:)] Big Smile [:D] Cool [8D] Blush [:I]
Tongue [:P] Evil [):] Wink [;)] Clown [:o)]
Black Eye [B)] Eight Ball [8] Frown [:(] Shy [8)]
Shocked [:0] Angry [:(!] Dead [xx(] Sleepy [|)]
Kisses [:X] Approve [^] Disapprove [V] Question [?]

 
Check here to subscribe to this topic.
   

T O P I C    R E V I E W
RandyAmy Posted - 09/16/2018 : 06:36:39
I know this topic of wiring to mast has been discussed here several times, but not sure I have seen this addressed. I need to run new wires to my deck connector for mast. Does the wiring from the panel run along the port side at the deck/hull joint? If it does, is it behind the wood trim at the joint or is it inaccessible between deck and cabin top? I am thinking about tapping into that wiring so i just have to replace wire from port side to center of deck. I am of the understanding I will just need to drill down through cabin top at connector and run and conceal wires as best as possible.
21   L A T E S T    R E P L I E S    (Newest First)
Leon Sisson Posted - 04/07/2019 : 20:05:23
Those are very nicely done electrical installations pictured above.

I use the 5-wire Aqua Signal #80100-7 Watertight Cable connector as well. I've put them on two boats, and recommend them. Like Tim Keating, I've had the retainer bail break or get lost.

Another thing to be aware of is the possibility of a flailing jib sheet finding its way under the horizontal connector, and ripping it out of the deck. Thoughtful planning of the installation should prevent that. Maybe pointing the cable end of the connector towards the mast, leaving just enough room to plug and unplug, cable bend snug against mast.

For routing new interior wiring across exposed surfaces, also check out LED strip aluminum mounting channel on Amazon. Available in several sizes, colors, and cross sections, squared off 'U' channel with translucent snap-in cover strip. Easy to drill, cut, and trim (I used a fine blade in a table saw). Looks tidy when fitted carefully.
keats Posted - 03/09/2019 : 17:08:18
quote:
Originally posted by RandyAmy

Keats, Can you tell me where the deck electrical connector is from and if you are happy with it?


Sure, it's an Aqua Signal Watertight Cable Outlet and Plug Assembly #80100-7.

https://www.defender.com/product.jsp?id=680929

Pros: It's sleek, easy to install and doesn't leak. There's a rubber gasket between it and the deck so no sealant is needed. It has weathered pretty well.

Cons: The cover that swings down and snaps over some pins on the sides of the male connector has broken on one side. I think the plastic on the cover is too thin as this is the second one I've seen do this. It holds together ok but I've been meaning to call the manufactured and ask for a new cover.

Be sure to tighten the wire lugs well before assembling the connector so they don't come loose when you are installing it.


RandyAmy Posted - 03/09/2019 : 09:59:06
Keats, Can you tell me where the deck electrical connector is from and if you are happy with it?
RandyAmy Posted - 03/09/2019 : 09:56:54
quote:
Originally posted by keats

[p]
[p]
[p][p]
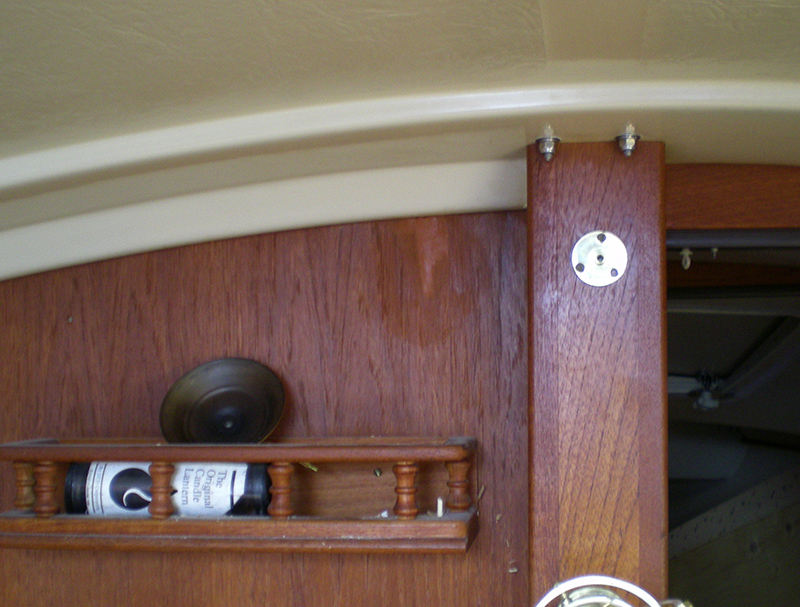
Here's my job with images from both sides of the bulkhead and a shot of the deck fittings.

blanik Posted - 10/02/2018 : 09:59:18
quote:
Originally posted by RandyAmy

Thanks for the pics blanik, very helpful. I will probably end up doing that same thing and be done with it. As far as drilling down from the old connector location, I had read a couple of comments about drilling on an angle forward, guess there is something to that!


The problem with drilling at an angle is that the deck connector might not lay flat on the deck when you install it, i actually drilled into the old connector hole that was straight on the bulkhead, i just drilled too deep, i should have put a tape on the drill bit to mesure how deep i was... not a big deal anyway, just caulk the deck connector with 3M 4000 and voilà
RandyAmy Posted - 10/01/2018 : 11:15:08
Thanks for the pics blanik, very helpful. I will probably end up doing that same thing and be done with it. As far as drilling down from the old connector location, I had read a couple of comments about drilling on an angle forward, guess there is something to that!
islander Posted - 09/30/2018 : 09:16:32
That's why they make wood filler, For the Ooopsee.
blanik Posted - 09/30/2018 : 08:11:48
I did the same as Redeye, i ran a new 4 wires tinned cable from the back of the panel, under the recess where the stanchion bolts are, all the way to the bulkhead, i drilled all the holes inside the recess so they don't show and i pulled the cable at the top of the head's side of the bulkhead and drilled a new hole where the old deck connector was... (the old cable didn't carry current to the deck connector anymore and the connector was old and corroded so i just cut the old wires where they where coming out to the switch panel and drilled a new hole over the old deck connector hole, filled it with epoxy and drilled a smaller hole in it so the cable would pass and put a brand new connector, that was 7 years ago and everything still works perfectly)

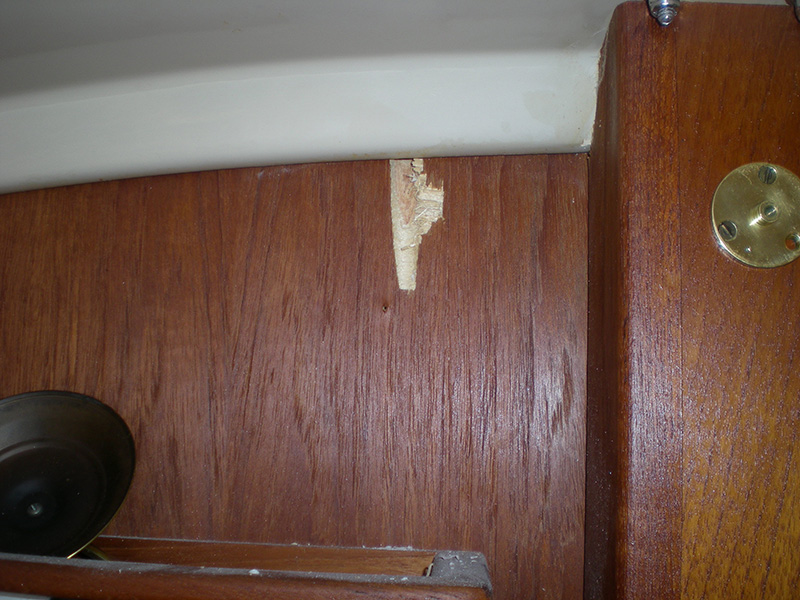
When I drilled the deck i was aiming for the inside of the head but it seems the original deck connector was right on the bulkhead... ooopsy!


I managed to fix it (barely shows when in the boat)

keats Posted - 09/24/2018 : 22:06:38
quote:

The USCG has their transmitter site on top of Mount Diablo...


That makes sense as I can see Diablo coming down from the lake.
hbushey Posted - 09/24/2018 : 20:27:53
quote:
Originally posted by keats

quote:
Originally posted by Voyager

Having a 25 foot VHF antenna mounted on the mast top provides a dozen miles or so more range than the range...

It helps because our lake is hills and canyons. More than once, I've had to relay transmissions from smaller boats in the far reaches back to the marina. I have picked up the Coast Guard on the SF Bay a few times and that's over a hundred miles away. That has to be line-of-sight.


Yes and no.

The USCG has their transmitter site on top of Mount Diablo, east of San Francisco Bay. Massive line of sight advantage. They can also remote repeat the transmissions to other Coast Guard stations, like Lake Tahoe. I’ve been under way on the lake and heard Sector San Francisco traffic on the Tahoe station repeater.
redeye Posted - 09/17/2018 : 19:11:43
Yepper... I don’t use shore power.
keats Posted - 09/17/2018 : 11:48:18
quote:
Originally posted by Voyager

Having a 25 foot VHF antenna mounted on the mast top provides a dozen miles or so more range than the range...

It helps because our lake is hills and canyons. More than once, I've had to relay transmissions from smaller boats in the far reaches back to the marina. I have picked up the Coast Guard on the SF Bay a few times and that's over a hundred miles away. That has to be line-of-sight.
Voyager Posted - 09/16/2018 : 22:45:28
Ray, I can’t believe what I’m seeing behind your power panel inside the fender locker — aka the dumpster. 120 VAC neutral and grounds intermixed and completely exposed for any unwitting scrounger at the dock to get the lesson of their life, maybe the LAST lesson of their life.
Ha, but you said that this was before you rewired the panel, I’ll bet it’s much better now.
Voyager Posted - 09/16/2018 : 22:36:47
Tim,
That’s a very nice job using the junction box. I like the reading lamp too. It was good that you could add the VHF feed through in the old mast cable location. Having a 25 foot VHF antenna mounted on the mast top provides a dozen miles or so more range than the range you get by mounting it to the stern pulpit. Geometry beats more power every time.
keats Posted - 09/16/2018 : 19:31:49
[p]
[p]
[p][p]
Here's my job with images from both sides of the bulkhead and a shot of the deck fittings.
RandyAmy Posted - 09/16/2018 : 12:15:49
Thank you for the pics redeye, they are a great help.
redeye Posted - 09/16/2018 : 11:14:05


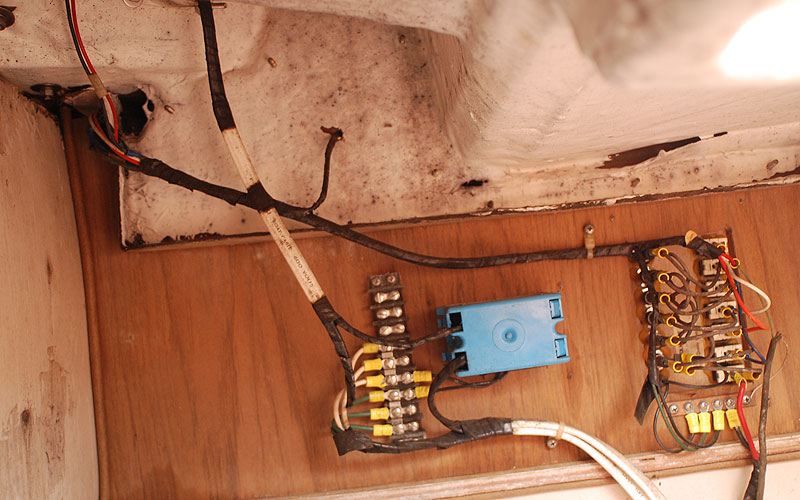
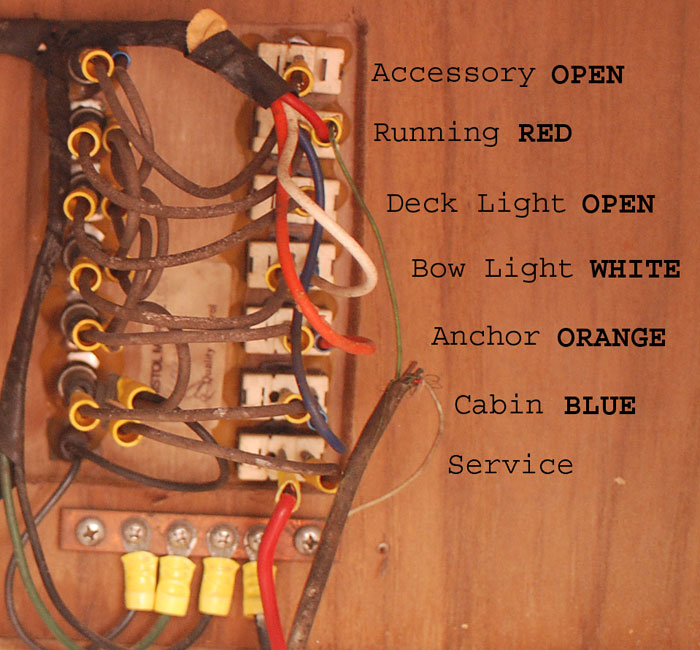
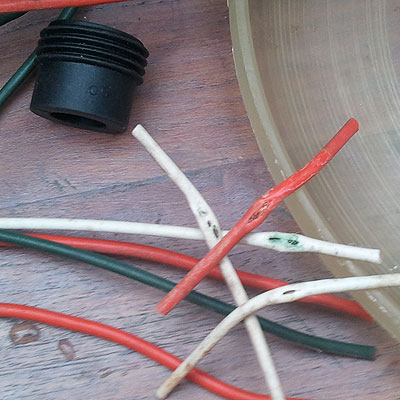
this is mine ( 1984 ) before I rewired, behind the panel.


As best I could tell these were the circuits.


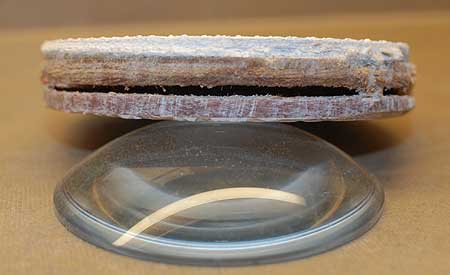
this is a cutout of the deck near the mast. You can see a gap between the deck and liner. The gap varies. I think the wiring may have been pulled into this gap on some boats. When I pulled my wiring out some wire appeared to have been compressed together, damaging the insulation.
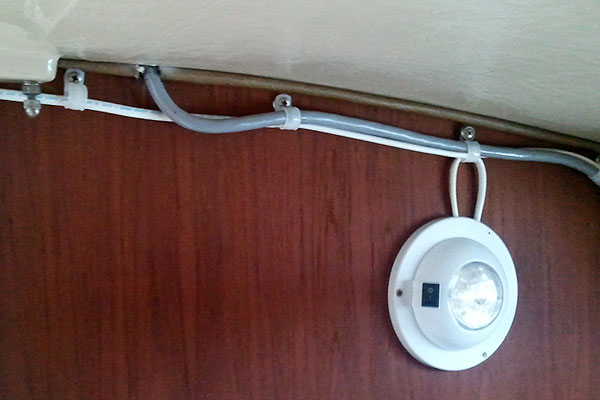
I bought marine 14-4 boat cable and rewired to the panel. I found it easy enough to hang the wire on the wood side strip that covers the deck/hull seam with cable ties that have screw attachments and a grommit through the bulkhead.


up the front side of the bulkhead and up to the deck fitting ( the gray cable ).


Anyhoo... I hope this helps...


keats Posted - 09/16/2018 : 09:55:12
quote:
Originally posted by RandyAmy

Thank you for the responses, being a new C25 owner this forum is a great resource. So as far as accessing the port side harness from panel, do I probably need to remove the port side cabin light and should find harness in that area?


All you need to do is reach your fingers up into the recess above the shelf that runs along the port side and you will find a bundle of wires.
RandyAmy Posted - 09/16/2018 : 08:49:25
Thank you for the responses, being a new C25 owner this forum is a great resource. So as far as accessing the port side harness from panel, do I probably need to remove the port side cabin light and should find harness in that area?
keats Posted - 09/16/2018 : 08:25:35
As Bruce's post indicates, the mast wiring is accessible on that port side harness all the way up to the bulkhead. There, those 3 or 4 wires to the mast are run through the cabin top molding and are probably semi-encased in fiberglass, which is why most have trouble pulling in new wires to replace them. I had three wires to the mast and wanted to add a fourth for a deck light.

I opted to take them through the bulkhead into the head. I ran some plastic cable track across to a small junction box just ahead of the compression post. I drilled up through the deck to a new deck connector (Aqua Signal 80100-7).

From the new junction box, I ran more cable track straight down the bulkhead and wired a flatscreen TV from the back, as well as a small BlueRay player and a brass light fixture above the table. The electronics run on their own circuit, back to the panel, and the brass lamp is tapped into the cabin lighting circuit. From the salon side, things look very trim and no wires are visible. I used very few wire nuts and no butt slices

Where the abandoned mast wiring penetrated the deck, I installed a new compression fitting and ran the coax for my VHF antenna.

Voyager Posted - 09/16/2018 : 07:41:42
When I rewired Passage I simply replaced all the old, worn and frayed cables with new wire. I used Don Casey’s book’s guidelines to determine wire gauge.
At that time I noticed that just behind the port side cabin light there were a bundle of wires. I checked the wires’ color code against the boat’s wiring diagram colors and found the four wires leading to the mast. The easy part was replacing the portion coming from the panel, the hard part was getting to the deck connector.
So I put my hand up behind the light and followed the wires as far forward as I could go. Since the wires still worked, I opted to leave the existing cables (that were sandwiched in) alone. I found a convenient point near the port bulkhead to splice in the new runs back to the panel. I could have extended the cables through the bulkhead and tacked up the cable along the top of the bulkhead to just alongside the compression post then drilled through the cabin top directly through the current connector hole to replace the connector and pull the cable through.
In my case I didn’t need to, but if the wire had crumbled and frayed, I would have done so.
So Randy, to answer your question, find the current wires by matching color code, drill through the cabin to connector hole and route your cables all the way back to the panel.

Association Forum © since 1999 Catalina Capri 25s International Association Go To Top Of Page
Powered By: Snitz Forums 2000 Version 3.4.06
Notice: The advice given on this site is based upon individual or quoted experience, yours may differ.
The Officers, Staff and members of this site only provide information based upon the concept that anyone utilizing this information does so at their own risk and holds harmless all contributors to this site.