Catalina - Capri - 25s International Assocaition Logo(2006)  
Assn Members Area · Join
Association Forum
Association Forum
Home | Profile | Register | Active Topics | Forum Users | Search | FAQ
Username:
Password:
Save Password
Forgot your Password?

 All Forums
 Catalina/Capri 25/250 Sailor's Forums
 Catalina 25 Specific Forum
 Replacement windows
 New Topic  Topic Locked
 Printer Friendly
Author Previous Topic Topic Next Topic  

mrapkins
Navigator

Member Avatar

USA
124 Posts

Initially Posted - 06/14/2010 :  05:28:47  Show Profile
On Papillion, my C25, we had already removed and re-bedded 2 windows but one of the re-bedded windows was still leaking and another original window was also leaking. Clearly something would have to be done.

So, one bright and sunny Thursday morning, work began. I arrived at the boat and within 25 minutes I had all the old windows removed. It was astonishing to see so little sealant in place, that is, if you can call it sealant. It looked more akin to plumber's putty! After about 2 hours, all the windows were free of “sealant” and silicone caulk apparently left over from another re-bedding attempt made by the previous owner.

Research showed that boat manufacturers are now using only a high-performance adhesive/sealant to install windows. The product they are using is called Dow 795. With this product, no mechanical fasteners are necessary, in fact, the performance of this product is so good that it is used to secure glass windows into high-rise buildings! This performance, and the fact that it costs only costs $6.95 a tube is why it has been widely adopted by both the construction and boat-building industries. As you can see on modern boats, no mechanical fasteners are used to attach acrylic windows, but the manufacturers have cunning methods to clamp the windows in place until the caulk cures. However, we needed a way to prevent the window from sliding down the cabin side, and to uniformly “clamp” the window to the curved sides. Others have used thru bolts with good results, however, drilling over 70 holes through the sides to thru-bolt the windows seemed like another great way to allow water to enter, and I wasn't to sure all those nuts would look to good when seen inside the cabin so I decided to use screws.

The cabin sides of a C25 are not very substantial, consisting of about 1/2” of exterior fiberglass and then loose plywood “shims” separating the sides from the liner.
In order to use screws, the entire periphery of the window openings had to be reinforced with epoxy

We mixed up some epoxy and then thickened it with filler to obtain a consistency of peanut butter and coaxed it into a disposable caulk tube. Getting the epoxy into the gap in the bottom of the window openings was straightforward, but getting it into the top was another matter. I injected the epoxy and my colleague encouraged it to stay by pushing drips back up into the gaps until the epoxy began to set. It was messy and definitely a 2-person job.

We then used the old window frames to create plywood templates that would be used to define the shape of the new windows. We made the templates larger than the existing exterior frames in order to provide an overlap that would allow us to position the screw holes further away from the edges of the acrylic and the window opening. The size of the upper overlap was somewhat compromised by the placement of snaps used to attach the pop-top cover, but we considered that allowing the window to encroach to within an 1/8” of the snaps would leave clearance to attach the cover and still provide enough overlap to keep the screw holes away from the edge of the window.

It was now around 3 o'clock and we decided to call it a day. Before leaving, we used special duct tape, (designed to be left in place for long periods without leaving residue after removal), to tape plastic sheeting over the windows to create a water-tight seal. We concluded that the plastic sheeting and duct tape had already improved the water-tightness of the boat!

Day 2 In the Workshop

The next day I fabricated the windows from a large sheet of 3/16” acrylic. Throughout the fabrication process I was careful to keep in place the protective paper covering both sides of the acrylic. Using my table saw and jigsaw I cut out the replacement windows using the templates and used my disc sander to fair the rounded corners. The freshly cut edges were then sanded with my random orbit sander using 220 grit paper and I used a small propane torch to polish the edges.

Day 3 Saturday, back to the boat.

The epoxy used to reinforce the openings had set up somewhat lumpy so the first thing we did was fair them using my random orbit sander with 80 grit sandpaper. It was now even more apparent that the openings were far from regular with the longer openings having “straight” edges undulating by up to 1/2. With the openings fair, we made more plywood templates, this time of the openings. These would be used to fabricate the trim rings that I was planning to make to hide the ragged edges.

In order to center the windows in the openings we came up with the brilliant idea of drawing vertical and horizontal index lines on the inside protective paper of each window. With me in the cabin and my colleague moving the window around outside, we carefully centered the window in the opening. We then traced the outline of the window opening onto the protective paper which allowed us to clearly see the overlap and consequently position the screw holes the correct distance from the edge of the acrylic and the window opening. The holes were drilled using a bit (specifically designed for plastics) mounted in my drill press, which we clamped to the tailgate of wife's pickup truck. After drilling the holes I used a utility knife to trace the window-opening line on the inside of the window and removed the protective paper, exposing the area of the window that would be adhered to the cabin sides (the overlap). The exposed edge of the acrylic was then scuff sanded in order to ensure good adhesion with the sealant. While I was doing this, my colleague was applying masking tape to the exterior of the cabin side all around the window opening.

We then positioned the window over the opening and, using a special self-centering “Vix” drill bit, we drilled two pilot holes into the cabin side and used 2 screws to allow us to temporarily mount the window in place. We then drilled all the other pilot holes and traced around the exterior of the window with a utility knife using just enough pressure to cut through the masking tape and not cut the gel coat. We removed the masking tape exposing the area of the cabin side to which the window would be adhered (the overlap). This area was also scuff sanded. If you have been able to follow the masking and cutting process, we now have the interior side of the window (where a lot of squeeze-out will occur) still covered with protective paper, and the exterior side of the cabin (where a lot of squeeze-out will occur) still covered with masking tape, and two perfectly matching scuff-sanded areas (the overlap) that will form the area of the bond between the cabin side and the window.

The Messy Part

It was now time to install the windows. Had we just been using a screw and washer to attach the window this would have been fairly straightforward, but we wanted to place a neoprene “spacer” washer between the window and the cabin side in order to prevent all the caulk from being squeezed out; having the spacer allows the window to remain about 1/32” away from the cabin side and form a solid (no voids) “gasket” of caulk between the window and the cabin side. This solid gasket ensures no leaks and additionally it completely hides the white cabin side. (If the caulk squeezes out completely it allows the white cabin side to become visible through the acrylic which detracts from the professional look we were trying to achieve).

The difficulty with this approach was trying to place the screw, the washer, and the neoprene spacing washer into each hole and then applying the caulk and then carrying the assembly up a ladder without losing any screws or washers, and then correctly positioning the window on the cabin side so that all the screws lined up with the pilot holes we had drilled previously. We found the best way to do this was to slide the window around on two of the boat's hatch boards so that as a hole passed over the gap between the hatch boards we could insert the screw and washer and then slide the screw up onto the hatch board so it would not fall out, and then place the neoprene spacer washer over the now-protruding screw threads. With all the screws protruding we applied a generous bead of caulk all around the window looping a bead of caulk around the screw threads to hold the screws, washers and spacers in place for their journey from the ground up the ladder to the boat. Once the first few screws were in things went fairly smoothly. We were careful not to over-tighten the screws. We did find that leaving the window in place overnight and allowing the caulk to set and then removing the masking tape/protective paper made for much easier clean up.

For the inside of the cabin I used the window-opening templates in order to fabricate some Cherry Trim Rings. These were designed to hide the ragged openings and really gave the project that “finished” look. Perhaps if I did not have the wood working equipment to make the Trim Rings I would have settled on just painting the epoxy filler that I used to fill the space between the inside of the cabin and the hull.

So, here is the big question. Was it worth it? It certainly was. Gone are the wet cabin cushions and floors, and anything that we stored on the shelves. What's more, this project makes my might boat look 10 years younger.

How do I embed pictures?


Edited by - mrapkins on 06/14/2010 07:45:48

JohnP
Master Marine Consultant

Members Avatar

1519 Posts

Response Posted - 06/14/2010 :  06:00:15  Show Profile
You can insert pictures by first uploading them to any website you choose (I use Shutterfly), and then copying the url of the appropriately sized image from that website into the Forum page using the "Insert image" button on the message creation page.

[url="http://www.catalina-capri-25s.com/forum/topic.asp?TOPIC_ID=2623"]Here [/url]are the full instructions.

Edited by - on
Go to Top of Page

mrapkins
Navigator

Members Avatar

USA
124 Posts

Response Posted - 06/14/2010 :  07:47:32  Show Profile
<blockquote id="quote"><font size="1" face="Verdana, Arial, Helvetica" id="quote">quote:<hr height="1" noshade id="quote"><i>Originally posted by JohnP</i>
<br />You can insert pictures by first uploading them to any website you choose (I use Shutterfly), and then copying the url of the appropriately sized image from that website into the Forum page using the "Insert image" button on the message creation page.

[url="http://www.catalina-capri-25s.com/forum/topic.asp?TOPIC_ID=2623"]Here [/url]are the full instructions.
<hr height="1" noshade id="quote"></font id="quote"></blockquote id="quote">

Doesn't work on my computer. In the thread you reference, none of the pictures display for me.

Edited by - on
Go to Top of Page

JohnP
Master Marine Consultant

Members Avatar

1519 Posts

Response Posted - 06/14/2010 :  07:52:30  Show Profile
Post the url for one of your uploaded pictures here and we can de-bug it for you. It's simple, once you have any website showing your photos.

Edited by - on
Go to Top of Page

mrapkins
Navigator

Members Avatar

USA
124 Posts

Response Posted - 06/14/2010 :  07:58:14  Show Profile
<blockquote id="quote"><font size="1" face="Verdana, Arial, Helvetica" id="quote">quote:<hr height="1" noshade id="quote"><i>Originally posted by JohnP</i>
<br />Post the url for one of your uploaded pictures here and we can de-bug it for you. It's simple, once you have any website showing your photos.
<hr height="1" noshade id="quote"></font id="quote"></blockquote id="quote">

I did. It's the little cross at the bottom of my original post - and here is another:


I go to Picasa, select "Link to this photo" then copy and paste the url.

Edited by - on
Go to Top of Page

Sloop Smitten
Master Marine Consultant

Members Avatar

USA
1181 Posts

Response Posted - 06/14/2010 :  08:29:42  Show Profile


Your link is to the display page, not the actual photo.

Edited by - Sloop Smitten on 06/14/2010 08:33:48
Go to Top of Page

Jan Briede
Navigator

Members Avatar

USA
162 Posts

Response Posted - 06/14/2010 :  09:10:16  Show Profile
Did you take the plywood shimming out before you filled it with epoxy, or did you leave those in place?
Thanks.
Jan

Edited by - on
Go to Top of Page

Jan Briede
Navigator

Members Avatar

USA
162 Posts

Response Posted - 06/14/2010 :  09:11:26  Show Profile
Great job! My excuses for not saying that first.
Jan

Edited by - on
Go to Top of Page

mrapkins
Navigator

Members Avatar

USA
124 Posts

Response Posted - 06/14/2010 :  10:12:43  Show Profile
<blockquote id="quote"><font size="1" face="Verdana, Arial, Helvetica" id="quote">quote:<hr height="1" noshade id="quote"><i>Originally posted by Jan Briede</i>
<br />Did you take the plywood shimming out before you filled it with epoxy, or did you leave those in place?
Thanks.
Jan
<hr height="1" noshade id="quote"></font id="quote"></blockquote id="quote">
Where the "shims" were rotten, they were removed. Also, the sides vary in thickness quite considerably, so sometimes I left them in to take up space/use less epoxy.


And here is the interior with the trim rings installed.


And an exterior close-up.


Edited by - on
Go to Top of Page

redeye
Master Marine Consultant

Members Avatar

3474 Posts

Response Posted - 06/14/2010 :  10:15:29  Show Profile
Nice work. Certainly worth the trouble.

Edited by - on
Go to Top of Page

JohnP
Master Marine Consultant

Members Avatar

1519 Posts

Response Posted - 06/14/2010 :  12:47:37  Show Profile
This woodwork seems quite sophisticated. I'd like to know how you made these interior pieces? Sorry to preempt part of your story, but I'm just curious.
.
.

Edited by - on
Go to Top of Page

OJ
Master Marine Consultant

Members Avatar

USA
4382 Posts

Response Posted - 06/14/2010 :  13:07:38  Show Profile
Mark,

Did you source the handrails? They are stainless?

Edited by - on
Go to Top of Page

islander
Master Marine Consultant

Members Avatar

USA
3994 Posts

Response Posted - 06/14/2010 :  17:56:07  Show Profile
Looks like somone has a wood shop. I like the SS handrails also. So when are ya going to do mine?

Edited by - on
Go to Top of Page

jimik
Deckhand

Members Avatar

Canada
10 Posts

Response Posted - 06/14/2010 :  18:13:11  Show Profile
That's just a whole lot of awesome and inspiration for when I hit the windows on my projects list. Thanks for putting this up!

Edited by - on
Go to Top of Page

Leon Sisson
Master Marine Consultant

Members Avatar

USA
1889 Posts

Response Posted - 06/15/2010 :  03:39:01  Show Profile  Visit Leon Sisson's Homepage
Fantastic! Both the project and the clear written description. Thanks for posting it. I hope this will make it into some sort of long term C-25 maintenance & upgrade online manual/CD. Is anyone working on such a 'Best of' collection?

-- Leon Sisson

Edited by - on
Go to Top of Page

mrapkins
Navigator

Members Avatar

USA
124 Posts

Response Posted - 06/15/2010 :  04:25:53  Show Profile
<blockquote id="quote"><font size="1" face="Verdana, Arial, Helvetica" id="quote">quote:<hr height="1" noshade id="quote"><i>Originally posted by JohnP</i>
<br />This woodwork seems quite sophisticated. I'd like to know how you made these interior pieces? Sorry to preempt part of your story, but I'm just curious.
.
.

<hr height="1" noshade id="quote"></font id="quote"></blockquote id="quote">

The trim rings turned out to be a lot more difficult to make than I planned. Firstly, I wanted the rings made from one piece which meant using the widest cherry boards in my stock - and wasting the middle/cutout!
If you like, I can write up how they were made. Let me know. It's quite involved - and requires a table saw, dado blades, jig saw, spindle sander, router and bearing bit.

Edited by - on
Go to Top of Page

mrapkins
Navigator

Members Avatar

USA
124 Posts

Response Posted - 06/15/2010 :  04:30:43  Show Profile
<blockquote id="quote"><font size="1" face="Verdana, Arial, Helvetica" id="quote">quote:<hr height="1" noshade id="quote"><i>Originally posted by islander</i>
<br />Looks like somone has a wood shop. I like the SS handrails also. So when are ya going to do mine?
<hr height="1" noshade id="quote"></font id="quote"></blockquote id="quote">

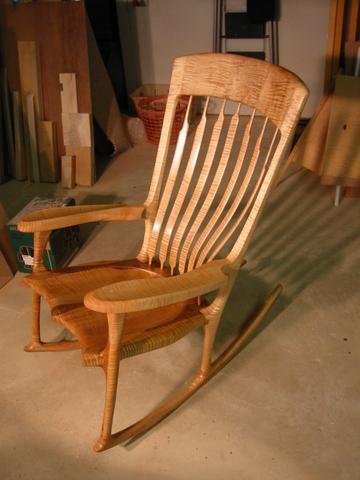
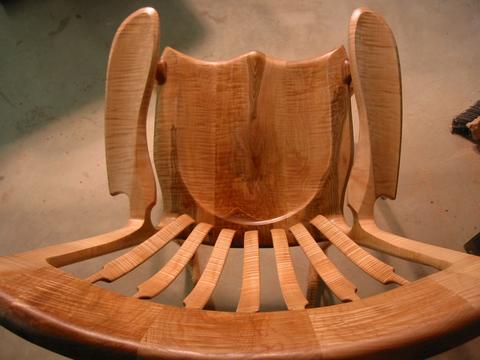
I have a wood shop. Here's a rocking chair I built.


The original owner had the SS handrails fabricated by a local guy. The rumour is he will never do it again!

Edited by - on
Go to Top of Page

OLarryR
Master Marine Consultant

Members Avatar

USA
3370 Posts

Response Posted - 06/15/2010 :  08:20:26  Show Profile  Visit OLarryR's Homepage
Wow ! You do great woodworking. I am also interested in how you made the curved frame for the window(s)....just from a woodworking perspective since my windows do not have frames. Really nice craftsmanship !

Edited by - on
Go to Top of Page

JimGo
Admiral

Members Avatar

USA
962 Posts

Response Posted - 11/03/2011 :  13:44:22  Show Profile
OK, bumping an old thread, but WOW, that looks great! Thanks for sharing the detailed description, too.

Edited by - on
Go to Top of Page

mrapkins
Navigator

Members Avatar

USA
124 Posts

Response Posted - 11/05/2011 :  05:41:03  Show Profile
<blockquote id="quote"><font size="1" face="Verdana, Arial, Helvetica" id="quote">quote:<hr height="1" noshade id="quote"><i>Originally posted by JimGo</i>
<br />OK, bumping an old thread, but WOW, that looks great! Thanks for sharing the detailed description, too.
<hr height="1" noshade id="quote"></font id="quote"></blockquote id="quote">

I was just returning the favor(s). I've received a lot of help and ideas over the years from this forum.

Edited by - on
Go to Top of Page
  Previous Topic Topic Next Topic  
 New Topic  Topic Locked
 Printer Friendly
Jump To:
Association Forum © since 1999 Catalina Capri 25s International Association Go To Top Of Page
Powered By: Snitz Forums 2000 Version 3.4.06
Notice: The advice given on this site is based upon individual or quoted experience, yours may differ.
The Officers, Staff and members of this site only provide information based upon the concept that anyone utilizing this information does so at their own risk and holds harmless all contributors to this site.