Notice:
The advice given on this site is based upon individual or quoted experience, yours may differ.
The Officers, Staff and members of this site only provide information based upon the concept that anyone utilizing this information does so at their own risk and holds harmless all contributors to this site.
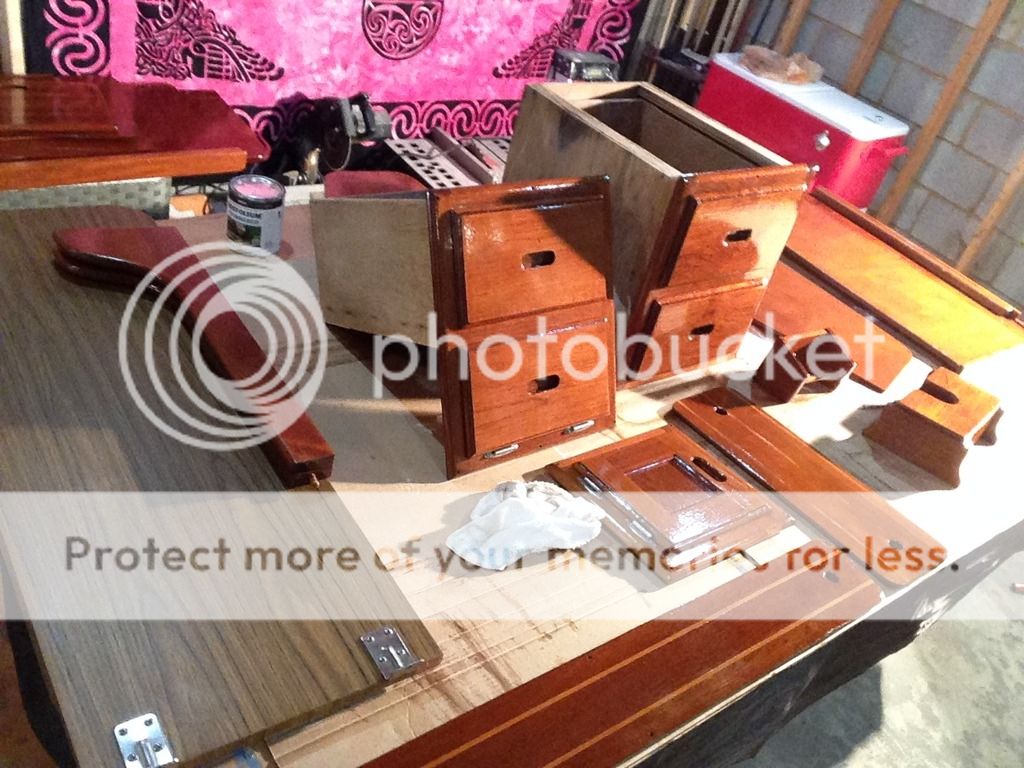
Saturday I gutted the interior and sanded down all the teak and applied a coat of cetol. Today got a coat of spar varnish on for a bit of a nice shiny look and it turned out good. In conjunction with doing a top to bottom cleaning, full reorganization and new cushions all around it's going to finally look pretty smart down there. Just have to finish all the removable bits and pieces to wrap it up.
Before pic:
Captain Rob & Admiral Alyson "David Buoy"-1985 C25 SK/SR #5053
Finished all the wood work. Going to go give another coat to the wood still fixed in place then do a serious scrubbing of the interior followed by the reinstallation of the wood in my basement. Pretty excited!
Before:
Captain Rob & Admiral Alyson "David Buoy"-1985 C25 SK/SR #5053
Can't begin to tell you how satisfying it is to see someone else's basement looking like mine, full of Catalina wood in various stages of preparation and varnishing!
Sailor Jerry C-25 "Sea Song" 1978, SK, Std. Pepin, WI
About 1 full weekend day and 5 weekdays afterwork (5pm-whenever) sanding and applying coats. Sanding makes a mess so when doing the fixed wood inside the boat its good to have everything removed and plan on a thourough cleaning afterwards. I slapped a coat on the woods that I brought home whenever possible, sometimes before work, then did whatever until ready for the next coat. All in all, I did one coat of Cetol Light and 2 coats of varnish (Minwax Helmsman outdoor clear gloss) on the stuff fixed in the boat and for everything I brought home I did an additional 2 coats of clear because of the ease. I'm usually function over form which is why this project hadn't taken precedent until now, but with everything else on the interior being upgraded it would've looked out of place.
Also, you can commit to the level of work you feel comfortable with. I decided on a more "surface level" refinishing in-lieu of a full on restoration due to time and work load constraints which will vary the amount of work required. I decided early on that the time and money required to do a craftsman grade finish on everything (which I am capable of) just wasn't in the picture. Otherwise, I would've sanded between each coat of clear and polish and the end, used brushes 4 times the cost of the ones I did, spent 4x the amount of time taping that I did, removed more wood than I did, rebuilt all of the drawers and sealed them.
You can see how it starts adding up and everyone will have their own particulars and reasoning that they adhere by. You just have to do what works for you and not overwhelm yourself. My goal is to spend more time sailing than fixing the boat. After the other guy posted his thread with his new table I decided to do mine as well only to shortly after decide that doing that along with rebuilding the drawers will be next spring's undertaking.
Really, at this point anything will look better than it did and I'm happy about that!
Captain Rob & Admiral Alyson "David Buoy"-1985 C25 SK/SR #5053
Looking really good. As soon as I get done with this galley rebuild it will be time for me to take care of all of my bright work as well. I just discovered that my companion way hatch boards are pine. Can you believe it? So I will be building new teak hatch boards as well. I see a lot of wood in your pics that I don't recognize, must be the differences between swingers and fin keels. Keep up the good work. Very inspiring.
Alright, completely scrubbed the entire interior, every crevice. Cleaned up great and it feels so good. Went back and reinstalled all the wood and voila! Just need a few screws that didn't turn up. You can see some damage on the bulkhead which unfortunately has been made apparent now. I will have to replace it in the future.
Captain Rob & Admiral Alyson "David Buoy"-1985 C25 SK/SR #5053
Just curious, Rob. This is the first instance where I have seen Cetol used as the base coat. Was there a particular reason for that? I'm also assuming that you took the teak down to bare wood before you used the cetol. Is that a correct assumption, or did you just smooth out and then rough up the existing finish?
Sailor Jerry C-25 "Sea Song" 1978, SK, Std. Pepin, WI
To be honest, not too much reasoning. Tried cetol as recommended by many and did not like the finish. Looked it up and realized it is actually a 2 part system which most people don't realize. So I did gloss top coats as the second part. I took the wood down as close to bare as possible, I'm sure there are parts that still has something left over.
Captain Rob & Admiral Alyson "David Buoy"-1985 C25 SK/SR #5053
Rob, thanks for your reply about the time investment. Your brightwork looks fantastic. Did you use the original Cetol or the Natural?
I used Cetol Light. I think you can follow that with Cetol Gloss for the glossy finish, but I did some research online regarding compatability after I put the cetol on and decided a clear spar gloss would work well for what I was looking for. Really wasn't vary happy after the cetol application because I really wanted the wood to be lighter, which is why I used cetol light, however it looked the same as before. After the gloss went on though it really seemed to lighten up.
Captain Rob & Admiral Alyson "David Buoy"-1985 C25 SK/SR #5053
Notice: The advice given on this site is based upon individual or quoted experience, yours may differ. The Officers, Staff and members of this site only provide information based upon the concept that anyone utilizing this information does so at their own risk and holds harmless all contributors to this site.