Notice:
The advice given on this site is based upon individual or quoted experience, yours may differ.
The Officers, Staff and members of this site only provide information based upon the concept that anyone utilizing this information does so at their own risk and holds harmless all contributors to this site.
Boat is in a marina and the old vinyl lettering has been painted over by the PO. Up close you can read it ok and the relief is present. This image has been heavily filtered to display contrast. Any chance this would make it easier to hand paint? I can't find the same font in the vinyl lettering companies that show up on the first few pages of a google search.
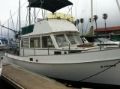
Molly Brown: 1967 Grand Banks 32-#34. Bronze, mahogany, teak, oak, with 120hp diesel to push all 10 tons. Currently an abuser of the bilge pump. Also... The Tall Rig Spirit: 1978, #973, Cast Fe Fin Keel on a Trailer
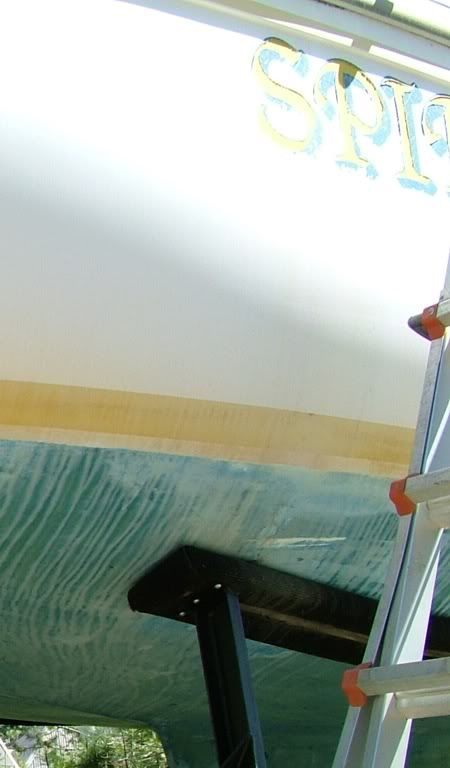
Here's an idea. Peel the vinyl letters off. Then clean a rectangular area around where the letters were. Perhaps painting the rectangle. Then reapply new name to the area. That would leave the name on what would appear to be a name board.
Peeling off the lettering under a few coats of marine polyurethane is more of a chore than I want. I gave it a quick try to clean off the paint with a potent solvent but it is on as a rock. No new name. I'm completely devoid of superstitions on land, but have fun with them on the water. My favorite story of the 'lore is I spent the night on a tall ship as a kid and was quizzing the mate on the five bell watch why a Richard Henry Dana Jr re-creation had a radar dome and VHF antenna his answer has stuck with me since: "them's witchcraft."
I dont know how to copy the font, but I'm just curious, why anyone ever tried to paint over the vinyl letters?? PO was in rush of hiding something or selling the boat?
Here are 2 other ideas to add to Paul's suggestion: 1. Use the vinyl lettering covered by bottom paint as a mask to paint around the letters with one or more colors, then use an exacto knife etc. to peel off the lettering and top paint. You end up with a neatly drawn, negatively painted, lettering job. You could finally wax the lettering to keep it white.
For the surround paint colors, you could quickly first paint a small oval around the lettered area in straight stripes or curved waves of 3 colors - red, orange, yellow, or light blue, medium blue, blue-green. You don't have to worry about the letters, since they will be removed as a mask after the surround area dries and hardens. The final result would be very hard to achieve without a perfect mask like you have, in the old letters.
Here's wavy stripes and white letters...
2. Another way to use the letters is to paint with a small brush around the margins of each letter. This would be careful, painstaking work. You could draw with a black marker or soft pencil to define the outline of each letter clearly, if they are hard to see in normal light. Paint right over the paint that's already on them. Then fill in the middle of each letter with a bigger brush.
Use Pettit Vivid bottom paint colors.
Protect the whole area below and temporarily to the left and right with newspaper or drop cloths and blue painter's tape to avoid spatter and drip damage.
Professional boat painters paint freehand using a lightly drawn design (pencil?), and if you're careful you can do exactly as good a job.
I'd recommend re-doing the white areas between and in the middle of the letters first, then do the final painting of each letter. Cleaning and polishing those areas between the letters is simple before you work on the vinyl letter areas, but after re-painting you would not want to touch those areas again.
You might want to clean sequentially with soap, acetone, dry the area, sand lightly, acetone, dry the area, use On and Off acid hull cleaner, then polish, and finally wax. These steps for making the white hull perfectly smooth and shiny are complicated and tedious but give good results that last well. There are many posts on the Forum about this.
Your old painted-over lettering can be used to re-do it in a number of ways.
In your circumstance, I'd hand-paint the same letters (but not with Pettit Vivid bottom paint.) First, I'd draw pencil lines around the letters, so I'd have a clear outline that looks right. I'd use a fairly small (maybe 1/4") artist's brush to cut in the edges, and then a somewhat larger (maybe 3/4" - 1"), good quality brush to fill in. Then you have the option of "raising" the letters a little, using a fine brush to put some black (?) lines along just one side (R or L) of each part of each letter, the way light would shadow them.
I'm puzzled by the roving texture--or what boat builders call "print"--I see in your pic--is that due to the extreme filtering? It makes we suspect somebody did some overly aggressive blasting or sanding, maybe to take the gelcoat off.
Relief does not mean they are still there, quite the contrary. Are you really sure they vinyl is still there? Look carefully at this photo, the letters are long gone but still readable and raised.
^^^ WOW! Great looking hull. We have TWO names still ghosting on our hull, I was going the easy route for now: Rubbing Compound, Cleaner Wax, Wax and then vinyl.
How did you clean / polish and who did the boot stripe and bottom job?
I use vert glass from lovettmarine.com like polyglow but I prefer it. This bottom job began with a soda blast and ended with hydro coat which I hate, my next 25 had VC 17. Go here if you want to see the bottom job in progress. this is the '82 album, the '89 album is available if you drill up to the gallery.
Thanky, this has been part pep talk and killer ideas like polishing and/or painting before lettering. The PO did do a few silly things like the two 4"x15' algae coated stripes below the water line and a couple rusted nicks on the keel bottom not addressed when he did the beautiful bottom barrier coats and anti-fouling (came with a trailer) and flat out said he painted over the lettering (hmm, he didn't say if it was vinyl or paint), but I have appreciated everything he did. It was too bad he just got too aged in his back to maintain a boat, he'll definitely get to be skipper on her again very soon once I get her to the impressive condition stage. Ok, sarcasm addressed and not appriciated and I not giving you the satisfaction of the unfiltered photo, which just looks chalky white, ha ha, I've been a bit to busy rebedding 32 year old fittings, backing/ reinforcing all strained rigging, doing the quantity of work that requires pumps on your epoxy, wiring and general bring up to ABYC standards. etc. I did polish the boot stripe, as you can see, and you can't see it is actually yellow. I'm a little sensitive to my ship-shape before ship-shine, it's coming. Witchcraft fun was I'm not changing her name, funny story, I recently sailed past a Cat 27 named Spirit and without my lettering confusion ensued when I shouted mines Spirit too.
If it would be infinitely easier to do this job while the boats on a trailer, I may ask around for some favors to borrow a truck.
I don't know yet about the checkering in that spot. On the other side, I only got though a square meter of white before I used up 3 wool pads with a 7 amp polisher, but it will shine! I've had best luck with 3M one step restorer wax, but I should probably use up that half gallon of rubbing compound. I'm kinda waiting to borrow a truck and get it in the launch ramp parking lot before I continue.
Like Frank, I'd suggest that you may not actually have vinyl letters under there to be able to remove. I removed the vinyl letters that had been on mine for many years (and who knows how many PO's.) and I discovered, to my dismay, that the gelcoat around them had eroded down below the original surface that had been protected by the letters. Running my fingers over the area I can feel the "raised" lettering very prominently.
I presume lettering painted on in a durable urethane would have provided similar protection. The letters may just have two layers of paint over the original surface, while the surrounding topsides only have a single, recently-applied layer over a surface that was lowered by the elements. I'm going to attack mine with a sanding board and very fine wet-or-dry (the flat, slightly flexible board, with handles at both ends, will bear on the raised letters and bridge over the areas between). I'm thinking I'll spray on a very thin dusting of dark enamel first, and let it dry for several days, so I can tell when the "raised" surface has been taken down to the surrounding level; I'm expecting to see the old name in white on a faint dark background until I get it down to the surrounding level and take off the enamel as well. It shouldn't take very long.
If this sounds like a good plan, please try it and tell me if it works
If you hand paint, use a rest stick. It's just a stick with a rubber ball on the end that you hold against the surface, then rest your hand - or the brush, as needed - on that stick while you paint. Guaranteed to make the lines neater and crisper. Like this, but of course one would be choking up on the brush a bit more:
oh, forum language, "^^^," not the sarcasm I took offense too. I too flipped through that album and the shine is beautiful. I'll be looking for a rest stick!
<blockquote id="quote"><font size="1" face="Verdana, Arial, Helvetica" id="quote">quote:<hr height="1" noshade id="quote"><i>Originally posted by rrick</i> <br />oh, forum language, "^^^," not the sarcasm I took offense too. I too flipped through that album and the shine is beautiful. I'll be looking for a rest stick! <hr height="1" noshade id="quote"></font id="quote"></blockquote id="quote"> You could buy one from an art supply place for $30:
Notice: The advice given on this site is based upon individual or quoted experience, yours may differ. The Officers, Staff and members of this site only provide information based upon the concept that anyone utilizing this information does so at their own risk and holds harmless all contributors to this site.