Catalina - Capri - 25s International Assocaition Logo(2006)  
Assn Members Area · Join
Association Forum
Association Forum
Home | Profile | Register | Active Topics | Forum Users | Search | FAQ
Username:
Password:
Save Password
Forgot your Password?

 All Forums
 Catalina/Capri 25/250 Sailor's Forums
 General Sailing Forum
 Honda impeller rebuild kit
 New Topic  Topic Locked
 Printer Friendly
Next Page
Author Previous Topic Topic Next Topic
Page: of 4

Voyager
Master Marine Consultant

Member Avatar

USA
5376 Posts

Initially Posted - 04/08/2012 :  09:54:24  Show Profile
Guess I was lucky - really lucky. Yesterday, while the boat was still up on jackstands in the yard, I tested the engine in my water-bucket. It's a 50 gallon plastic trash can that I set up under the Honda BF8D outboard.

I noticed the water coming out was not a solid stream, but just a trickle. I revved the engine and the water stopped running out entirely. I shut it off immediately.

I checked the water inlet to see whether it was clogged and when I opened the inlet panels, I found bits of rubber. Uh-oh!

I say I'm lucky because I could have found this fact out in three weeks when I launch <i>Passage</i>. I would have been out on the river in the current and would have had to drop anchor, paddle to shore, hope that the local parts store was still open on a Saturday (West marine does not carry the rebuild kit in stock). Had I missed the Honda retailer, <i>Passage</i> would have sat out in the river probably all week waiting for parts, or waiting for me to install the parts.

I went online and found a "Honda impeller rebuild kit" at Defender and ordered it. I have the shop manual that shows me how to do it. Has anybody actually done this for real on their Honda?

Are there any gotchas or additional pieces or parts you need "while you have the thing apart"?
&gt; The kit includes the impeller itself, two gaskets and an O-ring.
&gt; The kit does not provide the impeller liner, bearings, water tubes, couplers or fittings that are pictured in the repair manual.
&gt; There's also an "Impeller Key" which appears to hold the impeller on the shaft. Heaven help you if you lose that....

I'd appreciate any guidance or horror stories you may have had replacing your impellers.

Bruce Ross
Passage ~ SR-FK ~ C25 #5032

Port Captain — Milford, CT

Edited by - on

islander
Master Marine Consultant

Members Avatar

USA
4024 Posts

Response Posted - 04/08/2012 :  10:32:32  Show Profile
Bruce, I just did this on my BF9.9. Very straight forward to do. You don't need the cup that the impeller rotates in. The kit you got is fine. The old key-way will more than likely stay on the shaft when you pull the impeller out but your kit might have a new one anyhow, Mine did. Remove the four bolts holding the lower unit, Disconnect the shift rod and with a rubber mallet separate the lower unit. Remove the bolts for the impeller cover and remove. The two gaskets are for the stainless plate. Note the way the old impeller vanes are laying in the cup so that when you put the new impeller in they lay the same direction. I strongly suggest you change the thermostat also. Mine was 3 yrs old and when I looked at it It was frozen closed. The work of salt water even with flushing. Very easy to change but you will need a new gasket or make your own if you have gasket material. The first time is a little intimidating but after you do this once you will wonder why you ever paid someone to do this and you get to know the workings of your engine a little better.Another tip.. When you disconnect the shift rod, you do this in the opening that is just below the lower swivel joint on the leading edge. There will be a barrel nut and a lock nut. The barrel nut is longer. Unscrew the barrel nut, Leave the lock nut where it is this way when you put it back together you will screw the barrel nut back up to the lock nut and it will be back in its original position and you wont have to adjust the shift rod for proper shifting.

Edited by - islander on 04/08/2012 10:54:37
Go to Top of Page

Voyager
Master Marine Consultant

Members Avatar

USA
5376 Posts

Response Posted - 04/08/2012 :  11:21:26  Show Profile
Scott
So you suggest I swap out the thermostat at the same time?
On my engine, the thermostat is located in a separate housing bolted onto the head. I have to remove the voltage regulator to get at the housing. Thanks for the advice.
I wonder whether I'll need to do anything else while I'm at it?

Edited by - on
Go to Top of Page

islander
Master Marine Consultant

Members Avatar

USA
4024 Posts

Response Posted - 04/08/2012 :  12:18:20  Show Profile
Yes Bruce. On mine its just 2 acorn nuts but I would change it for peace of mind. Cheap insurance over buying a new engine. The tell tale only tells you that the pump is working. It won't let you know that the thermostat is opening or not. We don't have temp gauges so the engine will overheat before you will know anything is wrong. I also pulled the prop and re-greased the prop spline. I once had a prop frozen to the shaft on another boat, All the pullers in the world wouldn't break it free. Ended up having to cut the prop off.

Edited by - islander on 04/08/2012 12:30:42
Go to Top of Page

OLarryR
Master Marine Consultant

Members Avatar

USA
3466 Posts

Response Posted - 04/08/2012 :  12:23:52  Show Profile  Visit OLarryR's Homepage
I changed out my impeller this year. They did not have the kit in stock but had the impeller and gasket. I re-used the key. Only thing to make sure is that you have the right impeller part number. They first gave me one that did not fit my shaft. I brought it back. It took them some time to come up with the right one. I needed the one for the extra long shaft/high thrust model which has a slightly larger diameter impeller. That one fit. No issues with install. I put some ThreadBlocker lube onto the nuts including the adjustment nuts that shift forward/neutral/reverse. Outboard works fine. Actually, the old impeller was also fine but after 6 years decided it best to change it out.
Went sailing today. Heavy winds. Broke one of those Davis metal swivel tellatales I had on the stays but had an extra one in my cockpit locker. Also, broke a sail slug but had extras and replaced it when I finished sailing. This was on my old sails. Had my new sails cleaned and at home - Will put them on in a few weeks or so. Just resting on my boat for now. Heading home soon.

Edited by - on
Go to Top of Page

Voyager
Master Marine Consultant

Members Avatar

USA
5376 Posts

Response Posted - 04/08/2012 :  13:11:50  Show Profile
I was looking at Defender for the thermostat kit, but they did not have a stock kit. I went to one site where they have an exploded view with each part illustrated. There are gaskets, an O-ring, the thermostat, an anode and some fittings - I'll go for it. Better to do it all at the same time.

I don't plan to mess with the prop - if it ain't broke - you know what they say.

Edited by - on
Go to Top of Page

islander
Master Marine Consultant

Members Avatar

USA
4024 Posts

Response Posted - 04/08/2012 :  13:40:38  Show Profile
Bruce, You only need the thermostat and O-ring gasket. Parts # 5 and 7. Remove the 2 bolts #10, Remove the thermostat cover #6, Pull out old thermostat and O-Ring gasket, Put in new thermostat and gasket, Replace cover. Don't be so quick on the trigger, I would take a look at your thermostate first to see if its operational. Might just need a simple cleaning and testing in hot water. It should start to open around 165 deg. and be fully open at 185 deg. going by mine (9.9)

Edited by - islander on 04/08/2012 14:00:31
Go to Top of Page

Voyager
Master Marine Consultant

Members Avatar

USA
5376 Posts

Response Posted - 04/08/2012 :  14:28:05  Show Profile
Scott
I ordered parts 5 & 7 just now. Preventive maintenance only.

Edited by - on
Go to Top of Page

islander
Master Marine Consultant

Members Avatar

USA
4024 Posts

Response Posted - 04/08/2012 :  14:40:48  Show Profile
Bruce, Just remembered that on my thermostat there is a small hole in the flange of the thermostat. That hole is to be facing down in my engine. I don't know if it is the same on the 8hp so before you remove your old one look for a small hole and how it is orientated.

Edited by - on
Go to Top of Page

Voyager
Master Marine Consultant

Members Avatar

USA
5376 Posts

Response Posted - 04/09/2012 :  18:47:10  Show Profile
Scott
I'll check for that in the repair manual. Had an interesting experience yesterday (Easter Sunday). I went on Defender's website and I could navigate all around the site, but when I went to check out, I got an error for about an hour and a half. At first I saw an Apache Server error, then this was replaced by a "Sorry - please call customer support" message.
I realized I had a slim chance of speaking with anybody but I tried.
So next I replied to custserv@defender.com letting them know about the problem. Eventually I got thru and placed my order after some time had passed.
I later got an email from:
Stephan Lance
President
Defender Industries, Inc.
42 Great Neck Road., Waterford, CT 06385
Telephone: 860-701-3400 x.100
Website:  Defender.com

I was delighted and amazed!
He said "Roger that. Thanks for the heads up - sorry for any inconvenience".
That's why I love Defender Industries, they are real people who are concerned about their customers.

Edited by - on
Go to Top of Page

islander
Master Marine Consultant

Members Avatar

USA
4024 Posts

Response Posted - 04/10/2012 :  15:05:02  Show Profile
I to have had nothing but good service from Defender. For me It's usually 2-3 day shipping. I use to go to their satellite store in New Rochelle and was very disappointed when they closed it years ago. Their main store is a bit of a hike for me so its Internet ordering only now. Sure would love to hit that spring sale that they put on but the tank of gas and tolls would wipe out any bargains.

Edited by - islander on 04/10/2012 15:06:03
Go to Top of Page

Voyager
Master Marine Consultant

Members Avatar

USA
5376 Posts

Response Posted - 04/10/2012 :  21:02:43  Show Profile
Scott,
Next year, hop the ferry (it's pretty cheap as a walk-on) and I'll pick you up in Bridgeport. We can head up there together.

Edited by - on
Go to Top of Page

Voyager
Master Marine Consultant

Members Avatar

USA
5376 Posts

Response Posted - 04/13/2012 :  21:01:06  Show Profile
The impeller kit arrived yesterday and I'm planning to install it tomorrow morning. Thermostat kit is still a few days away.

Edited by - on
Go to Top of Page

TakeFive
Master Marine Consultant

Members Avatar

2272 Posts

Response Posted - 04/14/2012 :  20:42:31  Show Profile
Keep us posted of how it went. I may have to join the new impeller club. Got my motor mounted on the boat today and tested it out. The pee stream was a little weaker than before. Since I don't know when the impeller was changed last, I'll call the local Honda dealer next week. The boat is blocked with the lower unit right between my shoulders and waist, so it's a great time to do the work.

My motor is a 2000 BF15A with extra long shaft, which is mechanically identical to the BF9.9A. Those of you who noted a larger shaft for the XL model, was this for a BF9.9, or a smaller motor? (Wondering if the shaft difference is just for smaller HP or also would apply to the 9.9 and up models.) I want to make sure I have the right thing before taking it apart.

My thermostat housing has a very new looking green gasket around the edges. I was out of sunlight so I did not pull it off yet, but when I do I'm going to do the fishing line test in a pot of hot water before buying a replacement, especially since the gasket looks like it might have been replaced more recently.

Edited by - on
Go to Top of Page

Voyager
Master Marine Consultant

Members Avatar

USA
5376 Posts

Response Posted - 04/14/2012 :  21:18:02  Show Profile
Defender has the kit for approx $23. Never know what others will charge for the same thing.

Edited by - on
Go to Top of Page

TakeFive
Master Marine Consultant

Members Avatar

2272 Posts

Response Posted - 04/14/2012 :  21:35:14  Show Profile
<blockquote id="quote"><font size="1" face="Verdana, Arial, Helvetica" id="quote">quote:<hr height="1" noshade id="quote"><i>Originally posted by Voyager</i>
<br />Defender has the kit for approx $23. Never know what others will charge for the same thing.
<hr height="1" noshade id="quote"></font id="quote"></blockquote id="quote">
I found a kit for BF15D, but not BF15A. Note that the newer 15HP model is mechanically the same as their BF20D model, so it's probably significantly different from the BF15A.

If you found a kit for the BF15A or BF9.9A, please post a link.

I'd like to try to keep the local dealer in business (so he's there for me if I need to take the motor in somedsy), so I will check with him first. But if his price is outrageous or he has a long wait time, I'll use Defender if they have the right kit.

Edited by - TakeFive on 04/15/2012 03:46:34
Go to Top of Page

Frank Law
Navigator

Members Avatar

USA
159 Posts

Response Posted - 04/16/2012 :  12:19:18  Show Profile
Honda 8hp--Impeller probs.-- I have had to have my Impeller replaced twice in the last 4 years (most of the Blades were gone) . Last I was charged about $100. I'm wondering if running the motor in shallow water with sand/mud bottom is wearing the blades out??
Frank Law
"ABOUT TIME"
1983 #3519
SWK , sr

Edited by - on
Go to Top of Page

TakeFive
Master Marine Consultant

Members Avatar

2272 Posts

Response Posted - 04/16/2012 :  13:08:59  Show Profile
<blockquote id="quote"><font size="1" face="Verdana, Arial, Helvetica" id="quote">quote:<hr height="1" noshade id="quote"><i>Originally posted by Frank Law</i>
<br />Honda 8hp--Impeller probs.-- I have had to have my Impeller replaced twice in the last 4 years (most of the Blades were gone) . Last I was charged about $100. I'm wondering if running the motor in shallow water with sand/mud bottom is wearing the blades out??<hr height="1" noshade id="quote"></font id="quote"></blockquote id="quote">
Yes, from my 20+ years experience with outboard motors of various sizes, I would say that sucking sand up from the bottom can abrade the impeller blades. Mud could cake up between the blades, which could rip them off when it attempts to spin (especially if they are weakened by sand abrasion). However, I am going by what service people have told me - I have never personally seen this. This impeller rebuild will be the first that I have tried myself (thanks to the great support I get here).

FYI, my local Honda dealer has the BF9.9A/15A impeller kit (impeller + 2 gaskets + keyway) for $18, which I think is very reasonable vs. online dealers. He also has a "water pump" rebuild kit, which he says includes a replacement housing, for about $95. We agreed that I would disassemble the thing first and decide which kit I need. My motor is fresh water, so I don't expect to need a new housing, but I want to make sure before selecting between the two.

Edited by - TakeFive on 04/17/2012 09:46:02
Go to Top of Page

TakeFive
Master Marine Consultant

Members Avatar

2272 Posts

Response Posted - 04/16/2012 :  19:29:16  Show Profile
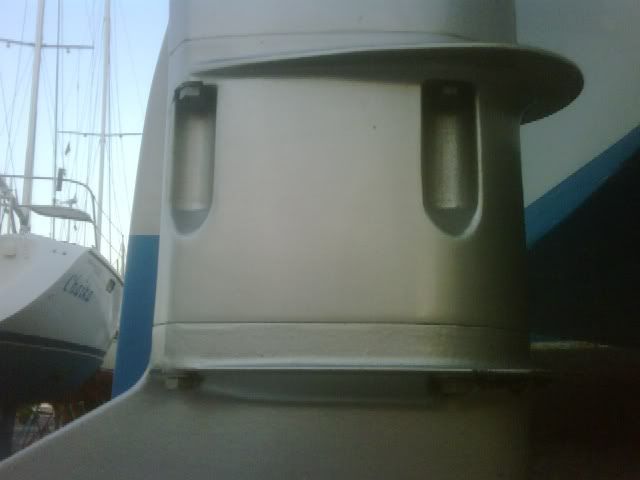
I started to pull the lower unit today, but stopped after loosening a few bolts to be sure I'm disconnecting it at the right place. There are three sets of bolts - four bolts at the top of the standard S/L model extension case (which screw into the bottom of the power head), four more that attach the special "X" model extension (which provides the extra length needed to turn this motor into the extra long version), and then four that bolt the lower unit onto this special extension. This picture shows the special "X" model extension and the two bottom sets of bolts:

<center></center>

I assume that Honda would put the pump as low in the unit as possible (to get good priming), so I should remove the four lowest bolts and remove just the lower unit.

If any of you have done this before, and/or are doing it now, please let me know whether this assumption is correct.

Also, I suspect that the various serrations in the shaft interconnections need to be greased prior to reassembly. Can you recommend what kind of grease has the right kind of heat resistance?

On a separate note, I took out the thermostat tonight. It was pretty crapped up with minerals - not salt, because that would have dissolved in water, but probably calcium. When I compressed the thermostat open there was a definite "crunch" followed by a lot freer movement of the spring, so it appears that the minerals may have been preventing the free flow of water. I was able to clean off the minerals with a small scrub brush, and everything seemed OK. But later I noticed that the cap was loose, and when I went to look closer it came off the pin completely. So now I'm definitely going to replace the thermostat, which is probably what I should have done rather than trying to clean it.

EDIT: I'm somewhat disappointed that these fancy Honda motors do not have an over-temperature alarm. Even my lowly Force outboard has one, as I discovered the hard way about 20 years ago.

Edited by - TakeFive on 04/16/2012 20:22:36
Go to Top of Page

Voyager
Master Marine Consultant

Members Avatar

USA
5376 Posts

Response Posted - 04/17/2012 :  00:49:02  Show Profile
I can't advise on which bolts to crack since I haven't started, nor am I at home next to my maintenance manual I plan to do it Saturday in the rain. Scott "Islander" mentioned a parts website above that provides the exploded view of the replacement parts and affected components I'd assume you could tell which bolts from that illustration.
I use the same cup grease for my trailer wheels as I use for my engine parts. It's a thick grease about the consistency of petrolatum ( petroleum jelly). It has worked out well so far

Edited by - on
Go to Top of Page

TakeFive
Master Marine Consultant

Members Avatar

2272 Posts

Response Posted - 04/17/2012 :  05:16:14  Show Profile
The only service manual I could find covers the S and L models, but not the X model. I think it was published before the X model was added. I'm assuming that the X model's extension is just a hollow shell, with longer tie rods and shaft to cover the distance. My dealer has said that it's just the newer motors (rounded housing) that have a fatter shaft for the X model.

Edited by - on
Go to Top of Page

OLarryR
Master Marine Consultant

Members Avatar

USA
3466 Posts

Response Posted - 04/17/2012 :  08:53:54  Show Profile  Visit OLarryR's Homepage
I just changed out the impellor this past winter but I cannot recall if there were two sets of bolts or not that I had to remove and re-install. I have the shop manual at home. So, I will have to get back to you.

Edited by - on
Go to Top of Page

TakeFive
Master Marine Consultant

Members Avatar

2272 Posts

Response Posted - 04/17/2012 :  10:11:02  Show Profile
I just picked up the parts from Hilton Marine in Elsmere section of Wilmington, DE: impeller kit ($18), thermostat ($35.50), thermostat gasket ($1.50). The thermostat price might have been a little high vs. other thermostats I've bought before, but I was not going to argue or shop around since he has given me helpful advice in the past that is worth more than a few extra dollars.

I mentioned my complaint to him about no overheat alarm. He told me that while the Hondas do not have overheat alarms built in, some do have a relay that sends a voltage to their external throttle/starter console, which contains an alarm buzzer. (Come to think of it, this is the same way my Force outboard does the alarm.) It sounds to me like an internal buzzer might be added inside the motor housing, if I can figure out how to tap into the wiring harness. This will go on the list of future possibilities, though not sure if I'd ever get around to it.

Edited by - on
Go to Top of Page

islander
Master Marine Consultant

Members Avatar

USA
4024 Posts

Response Posted - 04/17/2012 :  16:31:33  Show Profile
You have to remove the lowest section. You are dead on with the extension section being hollow with extensions for the drive shaft and water tube. Wheel bearing grease is fine. Your thermostat was stuck closed just like mine this is why I told Bruce to take a look at his and change it. What you think is minerals is what salt becomes after it is dissolved/heated then dried out. Water won't re-dissolve it. I'm not a chemist but it is called calcium something anyway an acid based liquid will soften it like vinegar.

Edited by - on
Go to Top of Page

TakeFive
Master Marine Consultant

Members Avatar

2272 Posts

Response Posted - 04/17/2012 :  20:19:35  Show Profile
Yes, I did use acid with the scrub brush to clean off the calcium deposits. I've done this before with the thermostat on my Force outboard, but this time the Honda thermostat came apart afterwards. The Honda dealer told me that Honda's thermostats are not as durable as other brands, and therefore need replacement more often than I may be accustomed to. My Force thermostat lasted 20 years, and in retrospect it probably did not even need replacement.

Trace minerals dissolve in river or sea water due to everything from soil content on the sea bed to crustacean remains ("hard water"). The solubility of the minerals goes down as the temperature of the water goes up, sometimes causing the amount of dissolved minerals to exceed the actual capacity of the water to dissolve them - a supersaturated solution. So things like thermostats, which are exposed to hot water for extended periods of time, are often exposed to supersaturated mineral solutions which will coat any surface that they come into contact with. Salt, while corrosive, does not typically have this problem because it will redissolve once the motor is switched off and the water cools.

Mineral fouling can also create an insulating layer that interferes with effective heat transfer between the cooling water and engine components, which is why some servicers will do a periodic acid flush to improve heat transfer.

Edited by - on
Go to Top of Page

OLarryR
Master Marine Consultant

Members Avatar

USA
3466 Posts

Response Posted - 04/17/2012 :  20:48:23  Show Profile  Visit OLarryR's Homepage
I checked my 2006 shop manual. For the extra long shaft model, you remove the lower end (gear case). The extension separator also comes off with the lower unit. When reinstalling, besides applying marine grease to the inside of the water impeller liner, you also apply marine grease to the inside of the vertical shaft bushing which is on top end of the extension separator. Also apply marine grease to the spline of the vertical shaft and the inside of the water tube seal.

Edited by - on
Go to Top of Page
Page: of 4 Previous Topic Topic Next Topic  
Next Page
 New Topic  Topic Locked
 Printer Friendly
Jump To:
Association Forum © since 1999 Catalina Capri 25s International Association Go To Top Of Page
Powered By: Snitz Forums 2000 Version 3.4.06
Notice: The advice given on this site is based upon individual or quoted experience, yours may differ.
The Officers, Staff and members of this site only provide information based upon the concept that anyone utilizing this information does so at their own risk and holds harmless all contributors to this site.